# Syncmate Introduction
With Syncmate you can define your custom logic around fetching, transforming and syncing data from any API into your Webflow CMS.
How does it work?
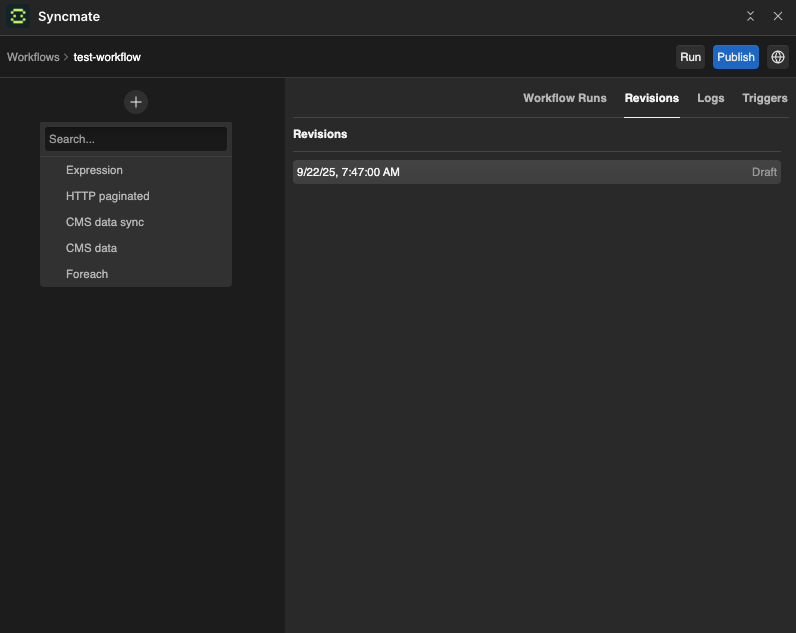
Syncmate is structured around workflows, actions and triggers. Workflow is a tree of actions that get executed based on specified trigger.\
\
For a concrete example, lets say you want to sync Stripe Products into your Webflow CMS. You would start with **HTTP paginated** action that will fetch data from Stripe. You would then use **Foreach** action to extract product from Stripe API response. Then you would sync that product into your Webflow CMS collection.
# Getting Started
# Workspaces
Workspaces in Syncmate are the primary way to organize and manage your workflows, team members, and Webflow site connections. Each workspace provides isolated access to workflows, team collaboration features, and connected Webflow sites.
## Understanding Workspaces
A workspace serves as the main grouping mechanism in Syncmate and includes:
* **Team management** - Invite and manage team members with different roles
* **Workflow organization** - All workflows belong to and are scoped within a workspace
* **Webflow site connections** - Connect and manage multiple Webflow sites within the workspace
* **Access control** - Control who can view, edit, or execute workflows
* **Environment isolation** - Separate environment variables, execution history, and settings
## Default Workspace
When you first sign up and connect Syncmate to Webflow, a "Default Workspace" is automatically created for you. This provides immediate access to workflow creation and management.
## Creating Workspaces
You can create additional workspaces to separate different projects, clients, or environments:
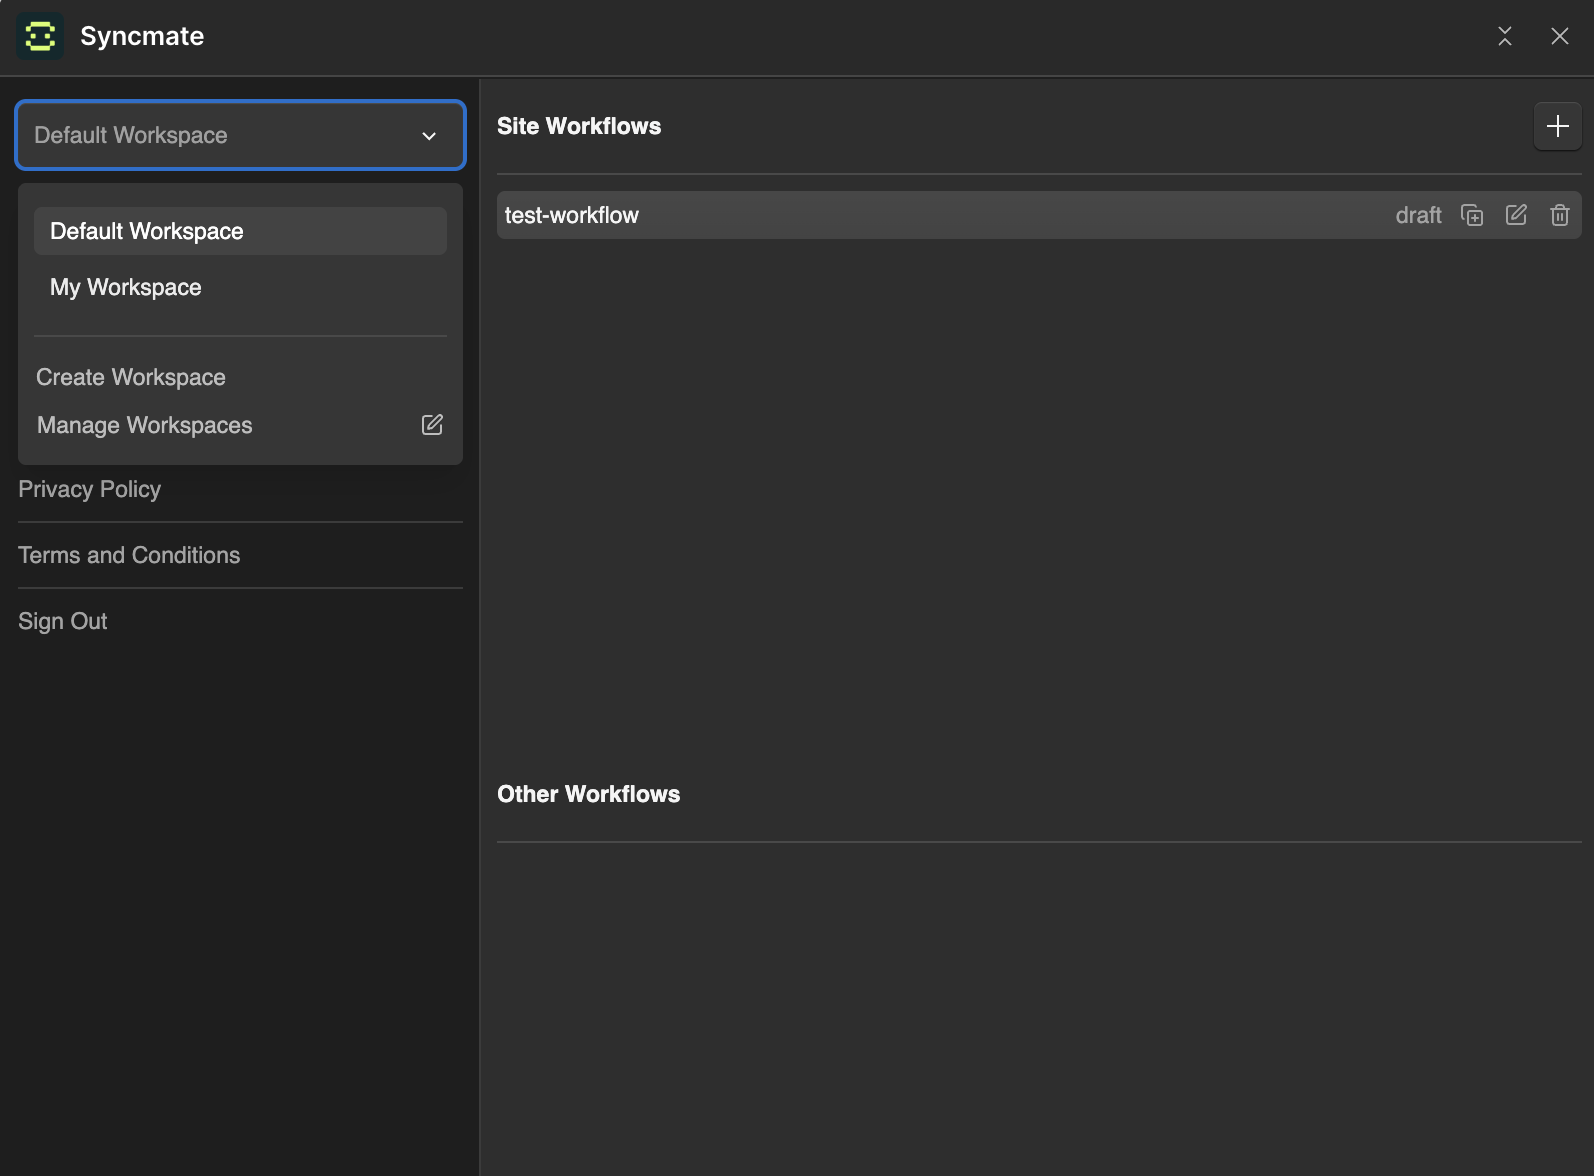
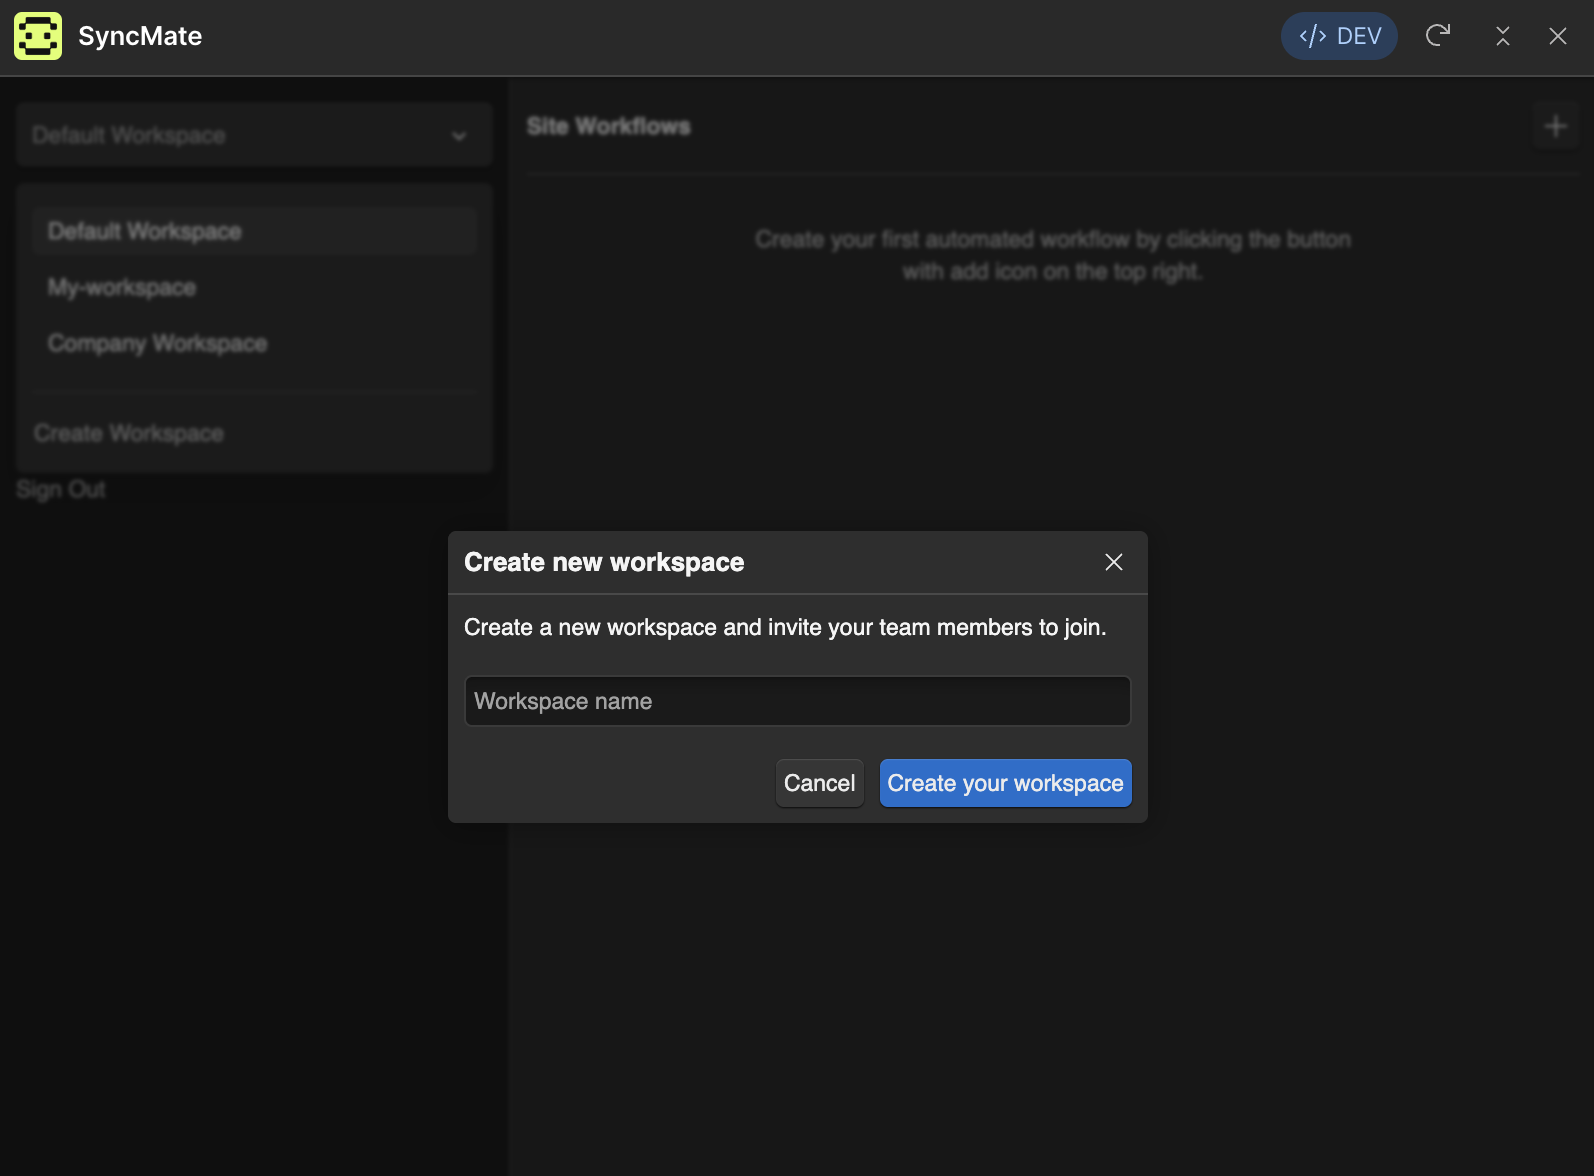
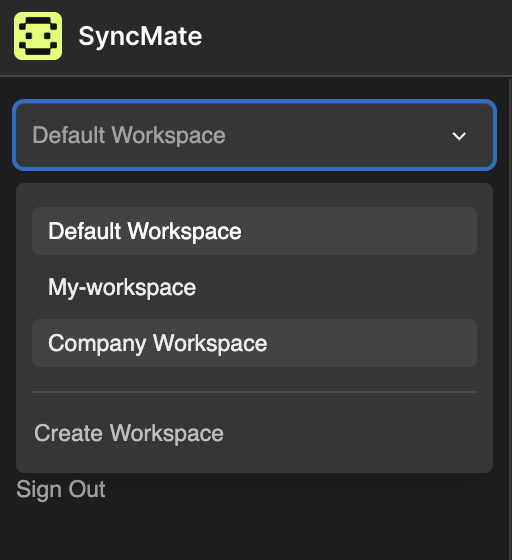
1. Click the workspace selector in the left sidebar
2. Select "Create Workspace" from the dropdown
3. Enter a descriptive name for your workspace
4. Click "Create your workspace"
Each workspace maintains completely separate:
* Workflow libraries
* Team member access
* Webflow site connections
* Environment variables
* Execution history
## Switching Between Workspaces
If you have access to multiple workspaces, you can switch between them using the workspace selector in the left sidebar. The selector displays:
* Your current workspace name (or "Select a workspace" if none selected)
* List of all workspaces you have access to
* Option to create new workspaces
When you switch workspaces, you'll see only the workflows, team members, and settings specific to that workspace.
## Workspace Roles
Team members within workspaces have specific roles that determine their permissions:
### Owner
* Full access to all workspace features
* Can manage all team members and their roles
* Can delete the workspace
* Can create and manage Webflow site connections
* Access to all workflow operations
### Admin
* Can create, edit, and delete workflows
* Can invite and manage team members (except other admins/owners)
* Can configure workspace settings
* Can view all execution history and logs
* Access to environment variable management
### Developer
* Can create, edit, and execute workflows
* Can view execution history for accessible workflows
* Limited team member management capabilities
* Can access non-sensitive environment variables
### User
* Can execute existing workflows
* Can view workflow execution results
* Limited access to workflow editing
* Cannot manage team members or workspace settings
### Guest
* Read-only access to workflows
* Can view execution history and logs
* Cannot create, edit, or execute workflows
* Cannot access environment variables or team management
## Webflow Site Integration
Workspaces can connect to one or more Webflow sites. Each Webflow site connection provides:
* **CMS access** - Read and write data to/from Webflow CMS collections
* **Site-specific workflows** - Create workflows that interact with specific site data
* **Isolated execution** - Workflow actions execute within the context of the connected site
* **Permission inheritance** - Access to site data is controlled through Webflow's API permissions
## Managing Your Workspace
Setting up a workspace involves several key steps:
### Team Access Management
1. **Invite team members** through the Members section
2. **Assign appropriate roles** based on responsibilities
### Workspace Configuration
3. **Connect Webflow sites** that your workspace will interact with
4. **Configure environment variables** for workflow integrations
## Best Practices
### Workspace Structure
* **Separate by environment** - Use different workspaces for staging and production
* **Client segregation** - Create separate workspaces for different clients or projects
* **Team boundaries** - Align workspaces with your team structure and access requirements
### Access Management
* **Principle of least privilege** - Grant only the minimum permissions needed
* **Regular access reviews** - Periodically review who has access to your workspaces
* **Clear naming conventions** - Use descriptive names that clearly identify the workspace purpose
### Workflow Organization
* **Environment-specific workflows** - Keep staging and production workflows in separate workspaces
* **Shared resources** - Use workspace-level environment variables for commonly used API keys and settings
* **Documentation** - Maintain clear documentation about which workflows connect to which Webflow sites
## Multiple Site Management
Within a single workspace, you can:
* Connect multiple Webflow sites
* Create workflows that interact with different sites
* Manage site-specific environment variables
* Control access to different sites through team member roles
This allows for flexible workflow management while maintaining proper access control and organization.
# Memberships
Memberships enable team collaboration within Syncmate workspaces. Through the membership system, you can invite team members, assign roles, and collaborate on workflow development and execution.
## Understanding Memberships
Memberships connect users to specific workspaces and define their access level. Each membership includes:
* **User identity** - The team member's email and account information
* **Workspace access** - Access to the specific workspace they were invited to
* **Role permissions** - What actions they can perform within the workspace
* **Invitation status** - Either "pending" (invitation sent) or "accepted" (active member)
## Adding Team Members
To add new team members to your workspace:
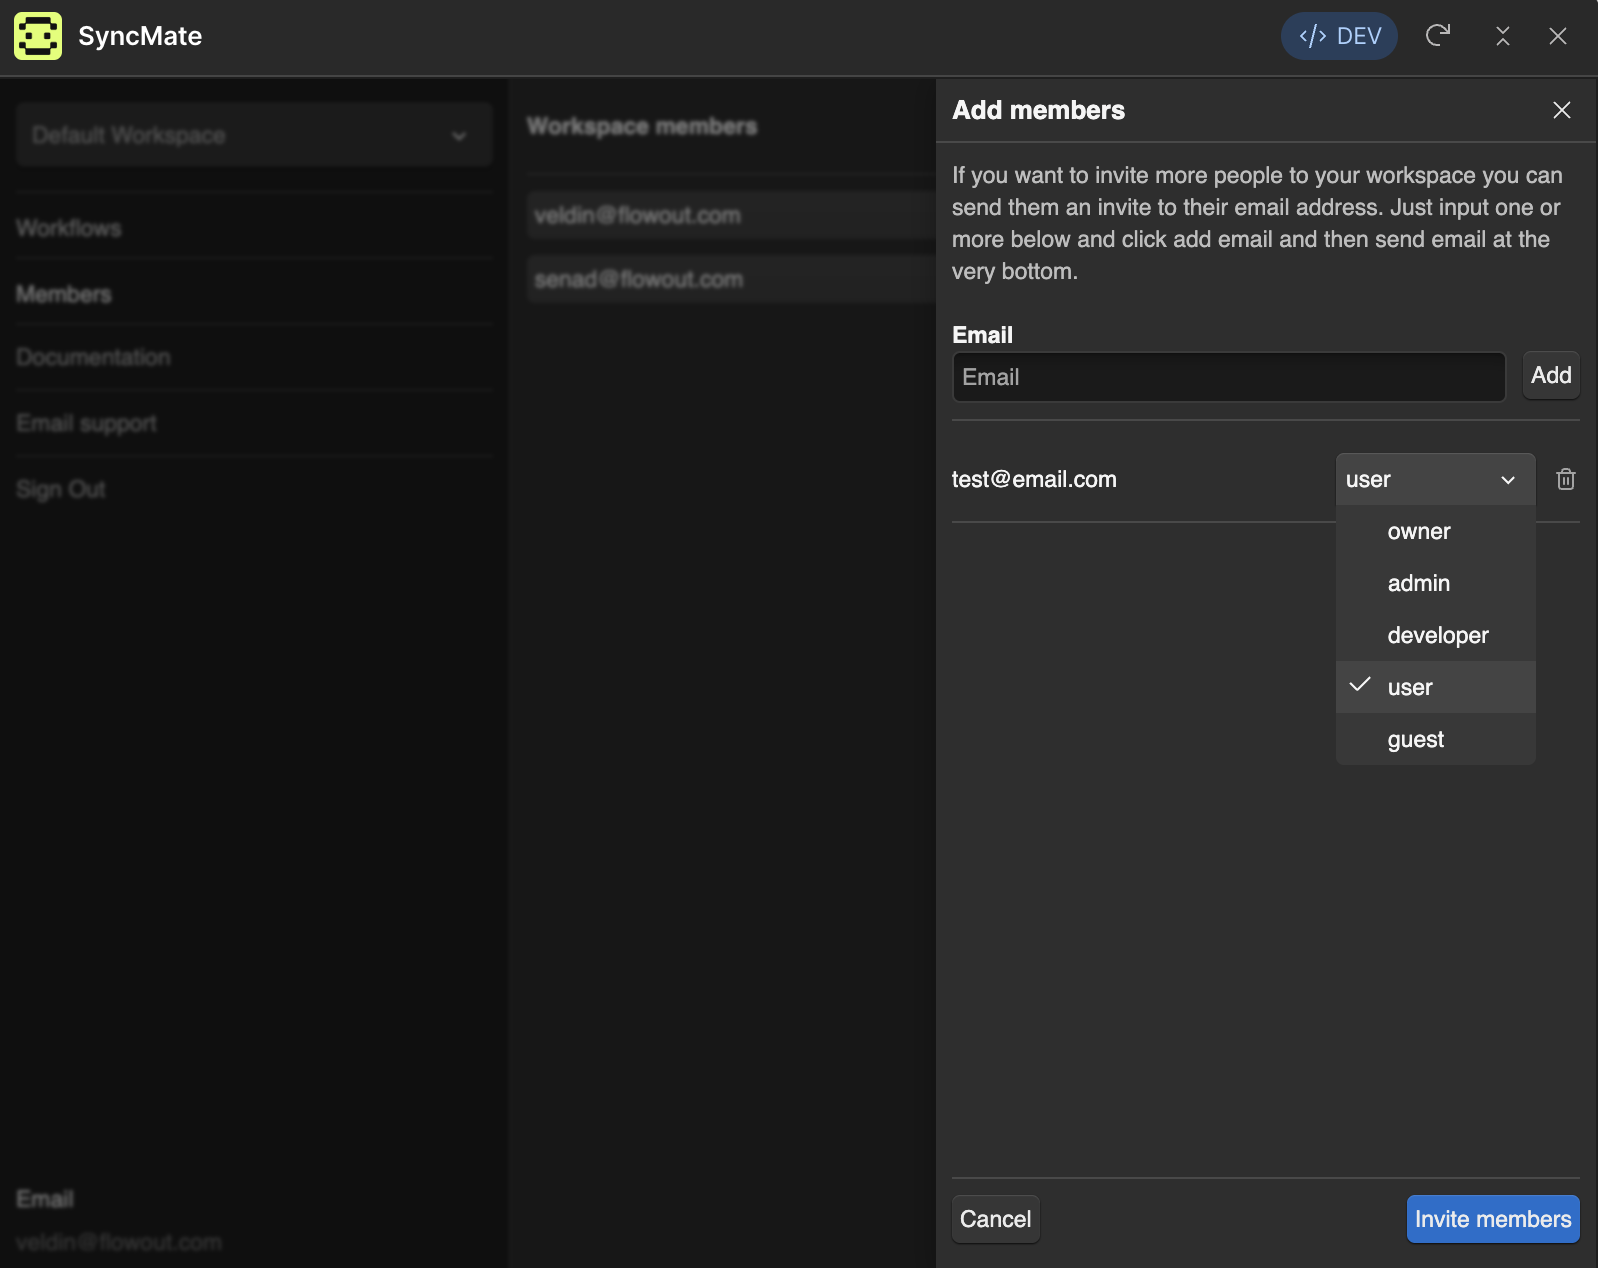
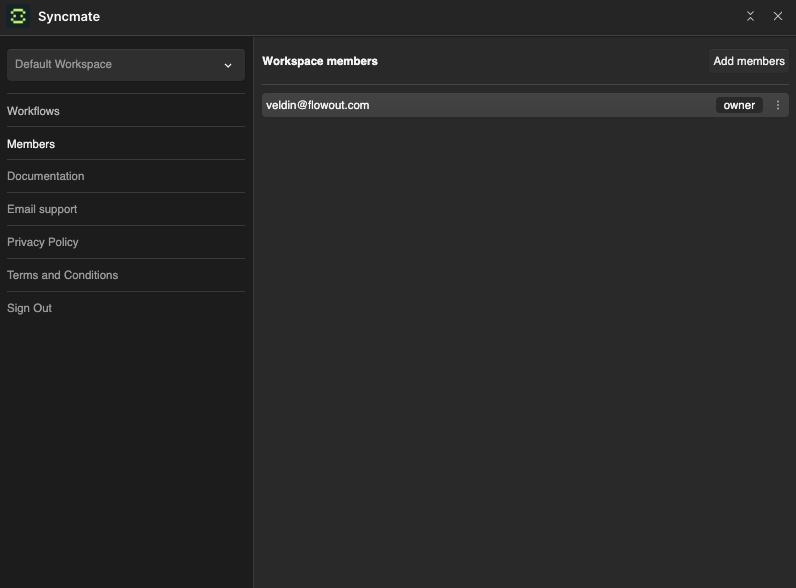
1. Navigate to the "Members" section from the left sidebar
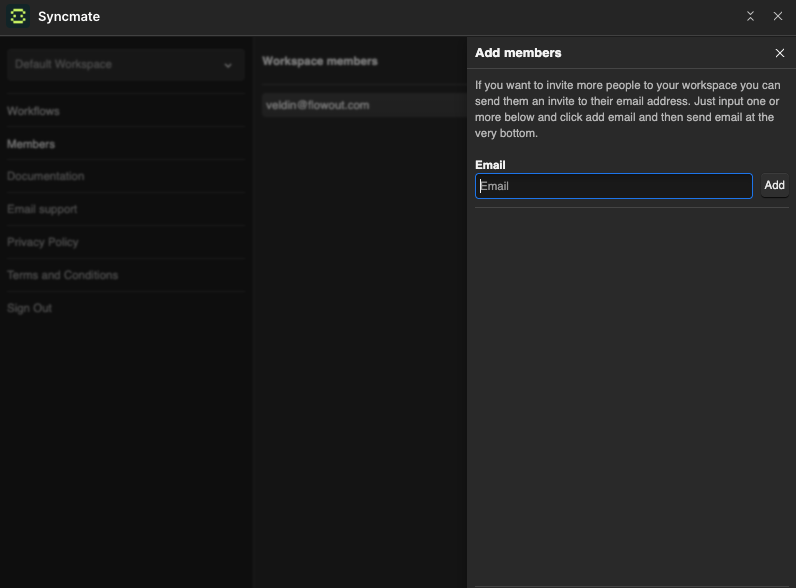
2. Click "Add members" button in the top right
3. In the side panel, enter the team member's email address
4. Click "Add" to add them to the invitation list
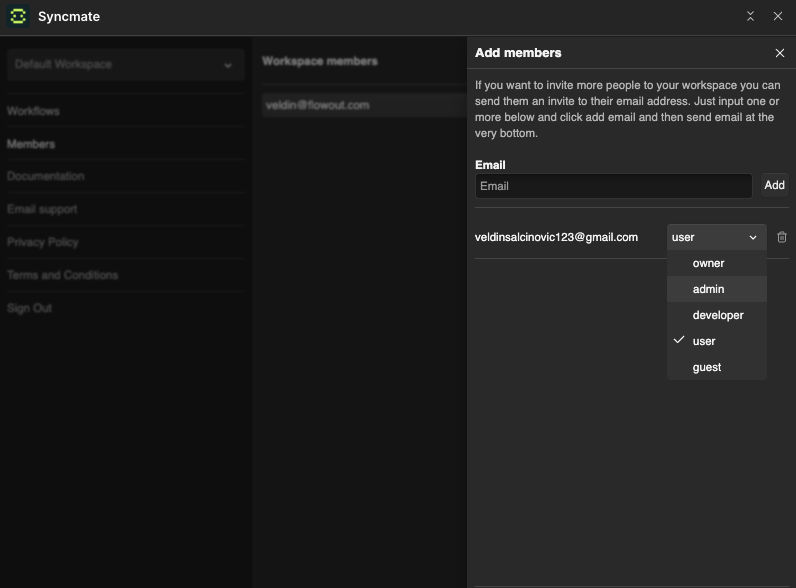
5. Select their role from the dropdown (defaults to "user")
6. Repeat for multiple members if needed
7. Click "Send invitations" to send email invitations to all added members
You can add multiple team members before sending the invitations, allowing you to batch invite your entire team at once.
## Membership Roles
Syncmate supports five membership roles with different permission levels:
### Owner
* Full access to all workspace features
* Can manage all team members and their roles
* Can delete the workspace
* Complete access to all workflows and settings
### Admin
* Can create, edit, and delete workflows
* Can invite and manage team members
* Can configure workspace settings
* Can view all execution history and logs
* Access to environment variable management
### Developer
* Can create, edit, and execute workflows
* Can view execution history for workflows
* Limited team member management capabilities
* Can access non-sensitive environment variables
### User
* Can execute existing workflows
* Can view workflow execution results
* Limited access to workflow editing
* Cannot manage team members or workspace settings
### Guest
* Read-only access to workflows
* Can view execution history and logs
* Cannot create, edit, or execute workflows
* Cannot access environment variables or team management
## Accepting Membership Invitations
When someone receives a membership invitation:
1. They receive an email with an invitation link
2. Clicking the link opens the Syncmate invitation page
3. They can sign in with an existing account or create a new one
4. Once authenticated, the invitation is automatically accepted
5. They gain immediate access to the workspace with their assigned role
The invitation system works seamlessly whether the invitee already has a Syncmate account or needs to create one.
## Managing Existing Members
In the Members section, workspace owners and admins can manage the team:
### Viewing Members
* See all workspace members with their email addresses
* View each member's current role
* See invitation status ("pending" for unaccepted invitations)
### Member Actions
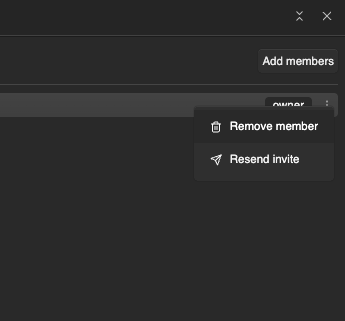
Each member has a menu (⋮) with available actions:
* **Remove member** - Revoke access and remove them from the workspace
* **Resend invite** - Send the invitation email again for pending invitations
### Member Status
Members show different statuses:
* **No status indicator** - Active member who has accepted their invitation
* **"pending"** - Invitation sent but not yet accepted
## Invitation Management
The system handles various invitation scenarios:
### Pending Invitations
* Show "pending" status next to the member's role
* Can be resent if the original email was missed
* Automatically convert to active membership when accepted
### Failed Deliveries
If an invitation email doesn't reach the recipient:
1. Use "Resend invite" from the member menu
2. Verify the email address is correct
3. Ask the recipient to check spam/junk folders
## Best Practices
### Role Assignment
* **Start with minimal access** - Begin with "user" or "guest" roles and promote as needed
* **Match roles to responsibilities** - Align permissions with actual job functions
* **Review regularly** - Periodically audit who has access and their roles
### Team Management
* **Clear communication** - Explain roles and expectations when inviting members
* **Onboarding process** - Provide guidance to new team members about workspace structure
* **Documentation** - Maintain clear documentation about workflow ownership and processes
### Security Considerations
* **Remove departed members** - Promptly remove access when team members leave
* **Monitor pending invitations** - Follow up on unaccepted invitations
* **Use appropriate roles** - Don't over-privilege team members beyond their needs
## Troubleshooting Invitations
### Common Issues
* **Email not received** - Check spam folders, resend invitation
* **Wrong email address** - Remove and re-add with correct email
* **Invitation expired** - Resend the invitation to generate a new link
* **Account conflicts** - Contact support if there are issues with existing accounts
The membership system is designed to make team collaboration seamless while maintaining proper access control and security.
# Workflows
Description coming soon.
# Actions
Workflow contains a tree of actions and actions are where you define logic for data fetching, transforming of the data and syncing of the final resulting data.\
\
Currently there are just four action types:
* [Expression](/getting-started/actions/expression)
* [HTTP paginated](/getting-started/actions/http-paginated)
* [Foreach](/getting-started/actions/foreach)
* [CMS Data Sync](/getting-started/actions/cms-data-sync)
Important concept with every action is that fields in actions that have highlighting are **JavaScript expressions**. Another important concept is that **ctx** object is used to pass data from parent into its children and to the next action in the scope.
# Expression
Expression action is a way to freely write any JavaScript logic that you need for transforming data, you can also write use Web [Fetch API](https://developer.mozilla.org/en-US/docs/Web/API/Fetch_API/Using_Fetch) to fetch or send any data.\
\
Important concept in Syncmate is **ctx** object that is passed from action to its children and next action. If you want to pass the data to the next actions assign your data to the **ctx** object, for example:
```javascript
ctx.computedUrl = `https://${cxx.dataFromPreviousAction}/rest/of/url`
if (Array.isArray(ctx.res.data)) {
const lastElementIdx = ctx.res.data.length - 1
ctx.lastElement = ctx.res.data[lastElementIdx]
}
// Only values stored in ctx object are passed to next actions.
```
# HTTP paginated
HTTP paginated action will help you fetch the data from paginated HTTP API endpoint. UI is similar to Postman but important thing to keep in mind is you can reference the data in **ctx** from previous actions and you can use JavaScript in the expression fields that have JS syntax highlighting.
Currently we only support JSON with HTTP paginated, if you will require SOAP of anything else you will for now have to resort to using [Expression action](/getting-started/actions/expression) and rolling your own logic. We are planing to add UI support similar to Postman in the future.\
\
Endpoint name is non functional this is just for easier tracking in the left side actions panel. Right below endpoint name there is a drop-down field where you select HTTP request method (GET or POST).
### HTTP Endpoint
**Important note:** currently you can not use JavaScript in HTTP URL, we will change that in the future to enable dynamic URLs and using **ctx** variables as URL.
### HTTP Headers
Next lets tackle Authorization headers. Headers are specified as string key non script-able and value that is a JavaScript expression, think of this as ``{ "Authorization": `Bearer ${env.apiKey}`}``.
You can see we are referencing **env.apiKey** for a bearer token, we recommend that you use [workflow environment variables](/getting-started/workflow-env-variables) marked as secret to specify any sensitive data.
Depending on what query parameters or body parameters your request requires you will need to specify those as well.
### HTTP Query Parameters
Lets start with HTTP query parameters. Same rules apply left side key is just a string and right side is JavaScript expression. Query parameters will be applied to URL in this case `https://api.stripe.com/v1/products?limit=50&shippable=false`
### HTTP POST Body
When doing HTTP POST request you will have to first select POST next to your endpoint and then new body tab will appear. Syntax for specifying body is a bit different, you have to write keys as a string.
### HTTP Script
There is an additional tab called Script that is meant to provide more flexibility, you can express all of the above UI concept directly in JavaScript code in there. You will have access to some variables that are passed to you and predefined as:
```javascript
const headers = new Headers()
const params = new URLSearchParams()
let body = undefined
// Those are predefined by the action you should not redefine those in your code!
```
Example of how the Script tab expression would look like for some of the examples we have done in the UI so far and one additional use case with if statement.
```javascript
headers.append("Authorization", `Bearer ${env.apiKey}`)
body = JSON.stringify({
name: "New product name",
active: true
})
params.append("limit", 50)
if (ctx.lastItemId !== null) {
params.append("starting_after", ctx.lastItemId)
}
```
### End Pagination On
Next you need to specify the JavaScript expression for **End pagination on**. By default this should be true so that action will stop after fetching first set of data, when you validate that everything is functioning, write the termination case that makes sense for your pagination.\
\
Some HTTP APIs return **has\_more** boolean as part of response, some return **next\_item** cursor and null if there are no more pages, and some endpoints just do not return any indicator. For no indicator in response, your logic should be if you have requested 50 items by specific some limit API parameter, then check if there is less the 50 items returned you know there is not next page and you should terminate.\
\
"End pagination on" Examples:
```javascript
// {data: {data: [], has_more: true} }
ctx.res.data.has_more === false
// {data: {data: [], next_item: "..."} }
!ctx.res.data.next_item
// req {limit: 50} -- {data: {data: []} }
Array.isArray(ctx.res.data.data) && ctx.res.data.data.length < 50
```
### HTTP Response Result
Finally in the bottom we have **Result variable** that specifies how the result should be saved in the **ctx** object. By default this is set to **res** which means that you will have the response in the **ctx.res**
The structure of the response object will be the following.
```json
"res": {
"data": {...},
"ok": true,
"status": 200,
"statusText": ""
}
```
# Foreach
Foreach action is just a more readable way of handling iteration over an array. Only thing to keep in mind is that **Iterate over** is JavaScript expression, if you want to reference data from other actions you need to use **ctx** object. **Iterator variable** on the other hand is not an expression but is just a name for output value that will be stored in **ctx** object.
### Iterator variable
Iterator variable is not an expression but a name for where to store the currently iterating item. With above example first item will be `ctx.product = ctx.products[0]` and so on for each iteration.
# CMS Data
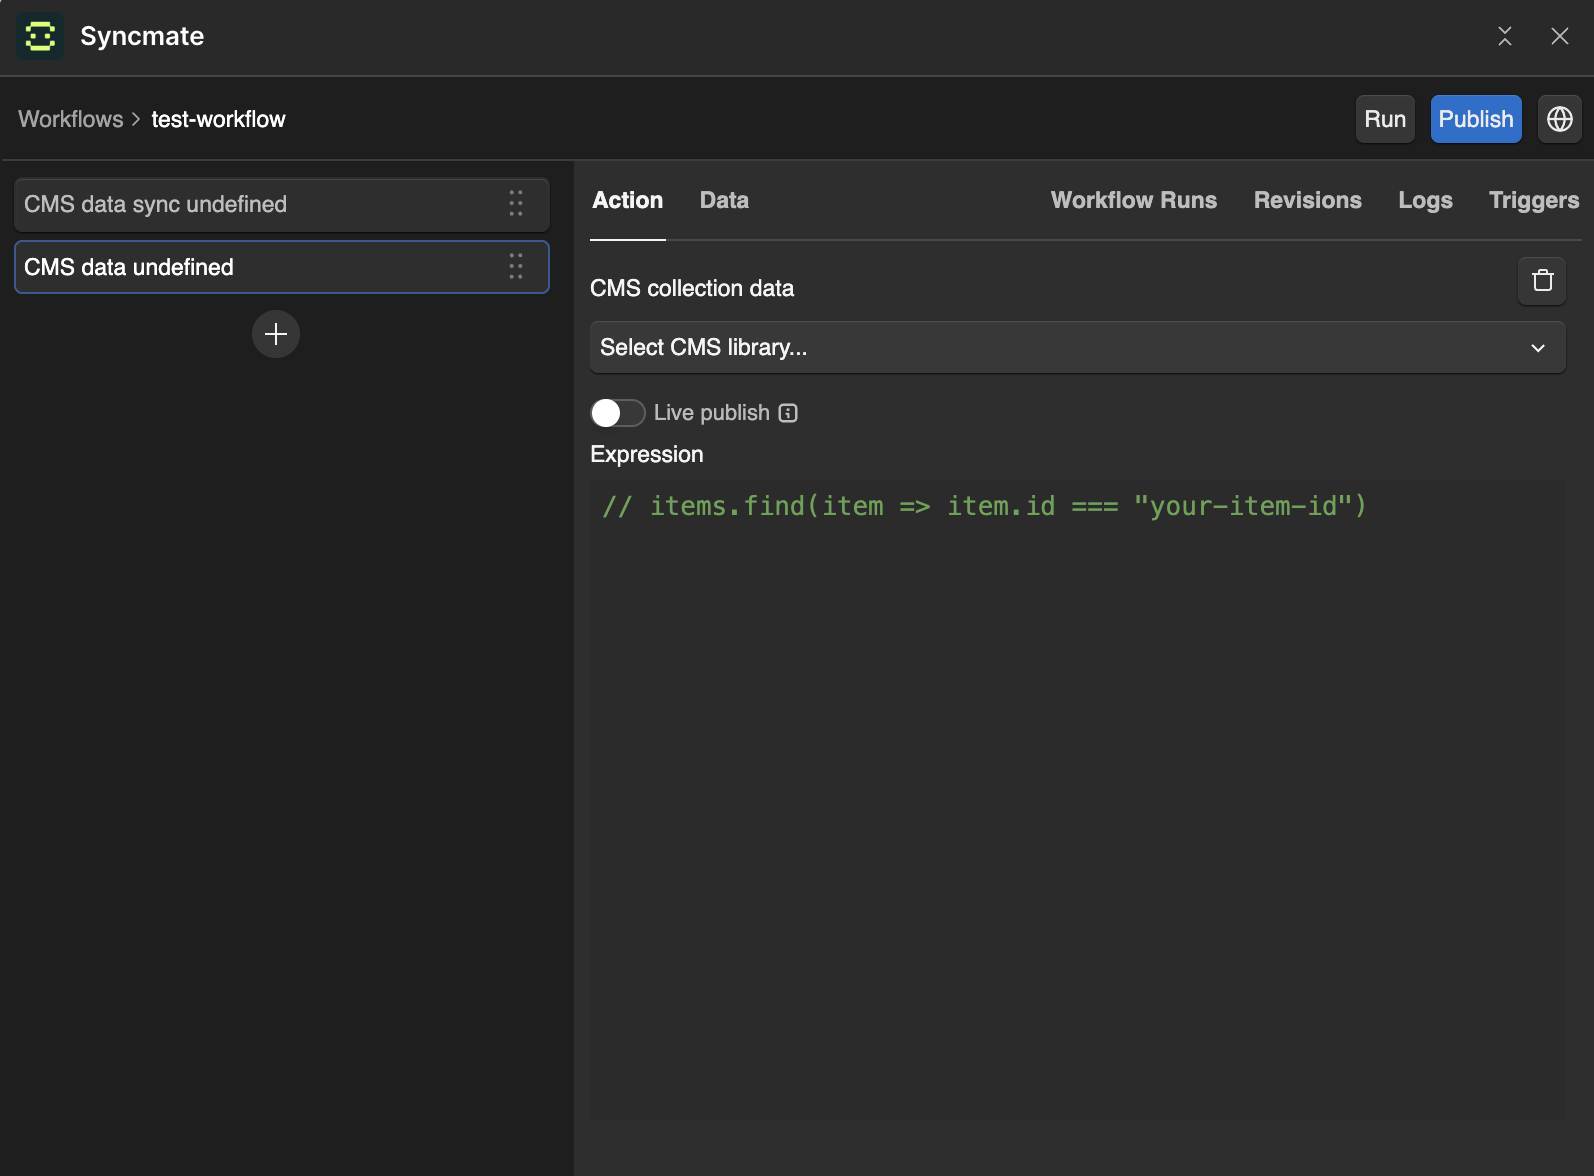
CMS Data action allows you to fetch and retrieve data from Webflow CMS collections within your workflows. This action is designed for reading CMS content and making it available to subsequent actions in your workflow.
## Overview
The CMS Data action connects to your Webflow site's CMS collections and retrieves items based on your configuration. Unlike [CMS Data Sync](/getting-started/actions/cms-data-sync) which writes data back to Webflow, this action is focused on reading and consuming CMS content.
## Configuration
### Site Selection
The action automatically uses your connected Webflow site. Ensure you have proper permissions to access the CMS collections you want to read from.
### Collection Settings
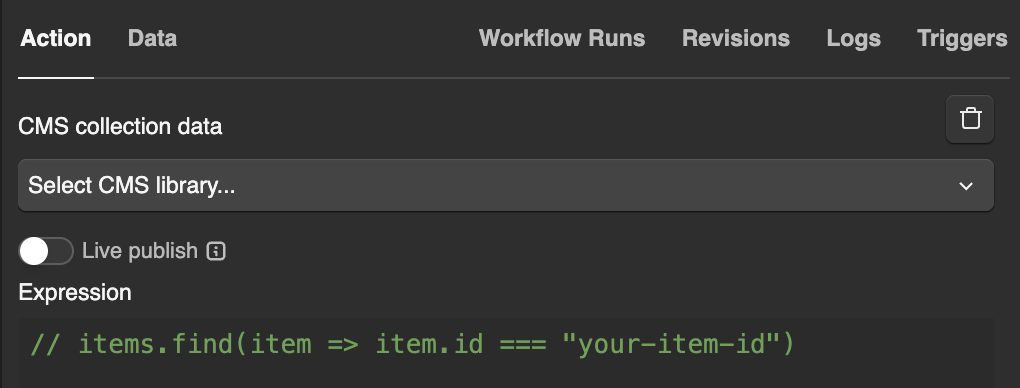
**Collection**: Select the CMS collection you want to fetch data from. The dropdown will show all available collections in your connected Webflow site.
**Live Publish**:
* **Enabled** - Fetches data from your live, published site
* **Disabled** - Fetches data from your staging/draft site
Choose based on whether you need the most current published content or if you're working with draft content.
### Data Expression
The **Expression** field allows you to write JavaScript code that processes the retrieved CMS data. Within this expression, you have access to:
* `items` - Array of CMS collection items
* `ctx` - Context object from previous actions
* `slug()` - Utility function to create URL-safe slugs
## Working with CMS Data
### Accessing Collection Items
CMS collection items are available in the `items` variable within your expression:
```javascript
// Access all items
items
// Get the first item
items[0]
// Filter items by a field
items.filter(item => item.fieldData.status === 'published')
// Sort items by date
items.sort((a, b) => new Date(b.fieldData.dateCreated) - new Date(a.fieldData.dateCreated))
```
### Data Structure
Each item in the `items` array has the following structure:
```javascript
ctx.cmsItems = [
{
id: "collection_item_id",
fieldData: {
name: "Item Name",
slug: "item-slug",
// ... your custom CMS fields
},
_archived: false,
_draft: false
},
// ... more items
]
```
### Expression Examples
Here are common patterns for working with CMS data:
```javascript
// Store all items for next actions
ctx.allItems = items
// Filter and store specific items
ctx.publishedPosts = items.filter(item => item.fieldData.status === 'published')
// Get the latest 5 items
ctx.recentItems = items
.sort((a, b) => new Date(b.fieldData.dateCreated) - new Date(a.fieldData.dateCreated))
.slice(0, 5)
// Create a lookup map by ID
ctx.itemsById = {}
items.forEach(item => {
ctx.itemsById[item.id] = item
})
// Extract specific field values
ctx.itemNames = items.map(item => item.fieldData.name)
// Filter based on previous action data
ctx.categoryItems = items.filter(item =>
item.fieldData.category === ctx.selectedCategory
)
// Count items by status
ctx.statusCounts = items.reduce((counts, item) => {
const status = item.fieldData.status || 'draft'
counts[status] = (counts[status] || 0) + 1
return counts
}, {})
```
### Accessing Field Data
CMS fields are accessible via the `fieldData` object. The available fields depend on your specific CMS collection structure:
```javascript
// Text field
item.fieldData.title
// Rich text field (HTML)
item.fieldData.description
// Number field
item.fieldData.count
// Boolean field
item.fieldData.featured
// Date field
item.fieldData.publishDate
// Image field
item.fieldData.featuredImage
// Reference field (single)
item.fieldData.category
// Multi-reference field (array)
item.fieldData.tags
```
**Note**: The actual field names depend on your CMS collection structure. Common fields include `name`, `slug`, `dateCreated`, and `dateUpdated`, but your collection may have different field names.
### Using the Slug Utility
The `slug()` function creates URL-safe slugs from text:
```javascript
// Create slugs from names
ctx.itemSlugs = items.map(item => ({ id: item.id, name: item.fieldData.name, slug: slug(item.fieldData.name) }))
// Use existing slug or create one
ctx.processedItems = items.map(item => ({ ...item, finalSlug: item.fieldData.slug || slug(item.fieldData.name) }))
```
## Use Cases
### Populating Reference Fields
The primary use case for CMS Data action is populating reference and multi-reference fields in other CMS collections:
```javascript
// Get single item ID for reference field
ctx.selectedCategoryId = items.find(item => item.fieldData.name === 'Featured').id
// Get array of item IDs for multi-reference field
ctx.tagIds = items
.filter(item => item.fieldData.status === 'active')
.map(item => item.id)
// Get specific items by criteria for references
ctx.authorIds = items
.filter(item => item.fieldData.role === 'author')
.map(item => item.id)
```
### Content Aggregation
```javascript
// Collect all blog posts for processing
ctx.blogPosts = items.filter(item => item.fieldData.type === 'blog')
```
### Data Validation
```javascript
// Check for items with missing required fields
ctx.incompleteItems = items.filter(item => !item.fieldData.title || !item.fieldData.description )
```
### Dynamic Workflows
```javascript
// Set different processing paths based on item count
ctx.processingMode = items.length > 100 ? 'batch' : 'individual'
```
### Reporting
```javascript
// Generate content statistics
ctx.contentStats = {
total: items.length,
published: items.filter(i => i.fieldData.status === 'published').length,
draft: items.filter(i => i.fieldData.status === 'draft').length,
archived: items.filter(i => i._archived).length
}
```
### Data Transformation
```javascript
// Transform data for external API
ctx.apiPayload = items.map(item => ({
external_id: item.id,
title: item.fieldData.name,
content: item.fieldData.description,
published: item.fieldData.status === 'published'
}))
```
## Best Practices
### Performance Optimization
* **Filter early**: Apply filters to reduce data processing
* **Limit results**: Use `.slice()` to work with smaller datasets when possible
* **Avoid deep processing**: Keep complex operations minimal for large collections
### Data Handling
* **Check for existence**: Always verify fields exist before accessing them
* **Handle empty collections**: Check `items.length > 0` before processing
* **Preserve original data**: Store original items if you need them later
### Context Management
```javascript
// Good: Store processed data for next actions
ctx.processedItems = items.map(item => ({ id: item.id, name: item.fieldData.name, status: item.fieldData.status }))
// Good: Create summary data
ctx.itemCount = items.length
ctx.publishedCount = items.filter(item => item.fieldData.status === 'published').length
```
## Error Handling
### Common Issues and Solutions
**Empty Results**
```javascript
// Check if data was retrieved
if (items.length === 0) {
ctx.warning = "No items found in collection"
return
}
```
**Missing Fields**
```javascript
// Safely access potentially missing fields
ctx.safeItems = items.map(item => ({ id: item.id, name: item.fieldData.name || 'Untitled', description: item.fieldData.description || '', status: item.fieldData.status || 'draft' }))
```
**Type Safety**
```javascript
// Ensure numeric fields are numbers
ctx.validNumbers = items.filter(item => typeof item.fieldData.count === 'number').map(item => item.fieldData.count)
```
## Expression Requirements
Your expression must:
* Process the `items` array as needed
* Store results in the `ctx` object for next actions
* Not explicitly return anything (the system returns `{ ctx: ctx }` automatically)
The processed context data will be available to all subsequent actions in your workflow.
# CMS Data Sync
CMS data sync action is where you specify how you want your data synced into Webflow CMS collection.
### Sync to CMS Library
Lets start with the first section of the action where you have to select Sync to CMS Library. In the dropdown you will have available all of your existing CMS collections. Note here that shown CMS collections are dependent on the site where you are using the Syncmate Webflow app.
### Live Publish
By default items are synced into CMS as a draft, waiting to be published. But there is a toggle under the Sync to CMS library drop-down called Live publish that you can toggle on to directly sync currently published live items. If you update the live items when your site visitors refresh the page they will already see updated CMS items.
For details on how to create CMS collections in Webflow you can search for Webflow specific tutorials. It is quite straight forward on the top left in Webflow designer editor you have CMS button.
### Create CMS collection
Specify the fields that you want in your CMS collection and save collection at the top right.
Now that you have the collection ready, lets start by specifying how the CMS items should be matched.
### Match Collection Item
With match collection item section you specify how CMS data sync action should identify and match in your collection. This field should be referencing unique field, usually id.
Action logic here is if this expression is matched, we will check if Sync fields of existing item differ from current item and in that case update. If we do not match any existing items we will create a new item.
### Collection Item Name
Collection item name is what is displayed as name in Webflow CMS when you are viewing collection items. The collection item name does not need to be unique.
### Collection Item Slug
Collection item slug is the URL slug displayed for CMS item and it needs to be in specific format defined by Webflow otherwise Webflow will return the error.\
\
Slug should match pattern `(^$)|^[_a-zA-Z0-9][-_a-zA-Z0-9]*$`
You can use built in `slug(value: string)` function that will reformat your string into slug complaint format.
### Sync Fields
Finally just specify a list of CMS fields that you want to sync and provide the data as a JavaScript expression. Make sure you transform the data in the correct format based on the type of field you have specified in the Webflow CMS field.
# Workflow Env Variables
Workflow environment variables is a secure way of storing your sensitive data that you need to reference in the action JavaScript expressions.
Later on in the code you can access those predefined environment variables, for example `env.apiKey` in this case.